DIY Fireplace Makeover: From Old Stone to Lime Wash Perfection
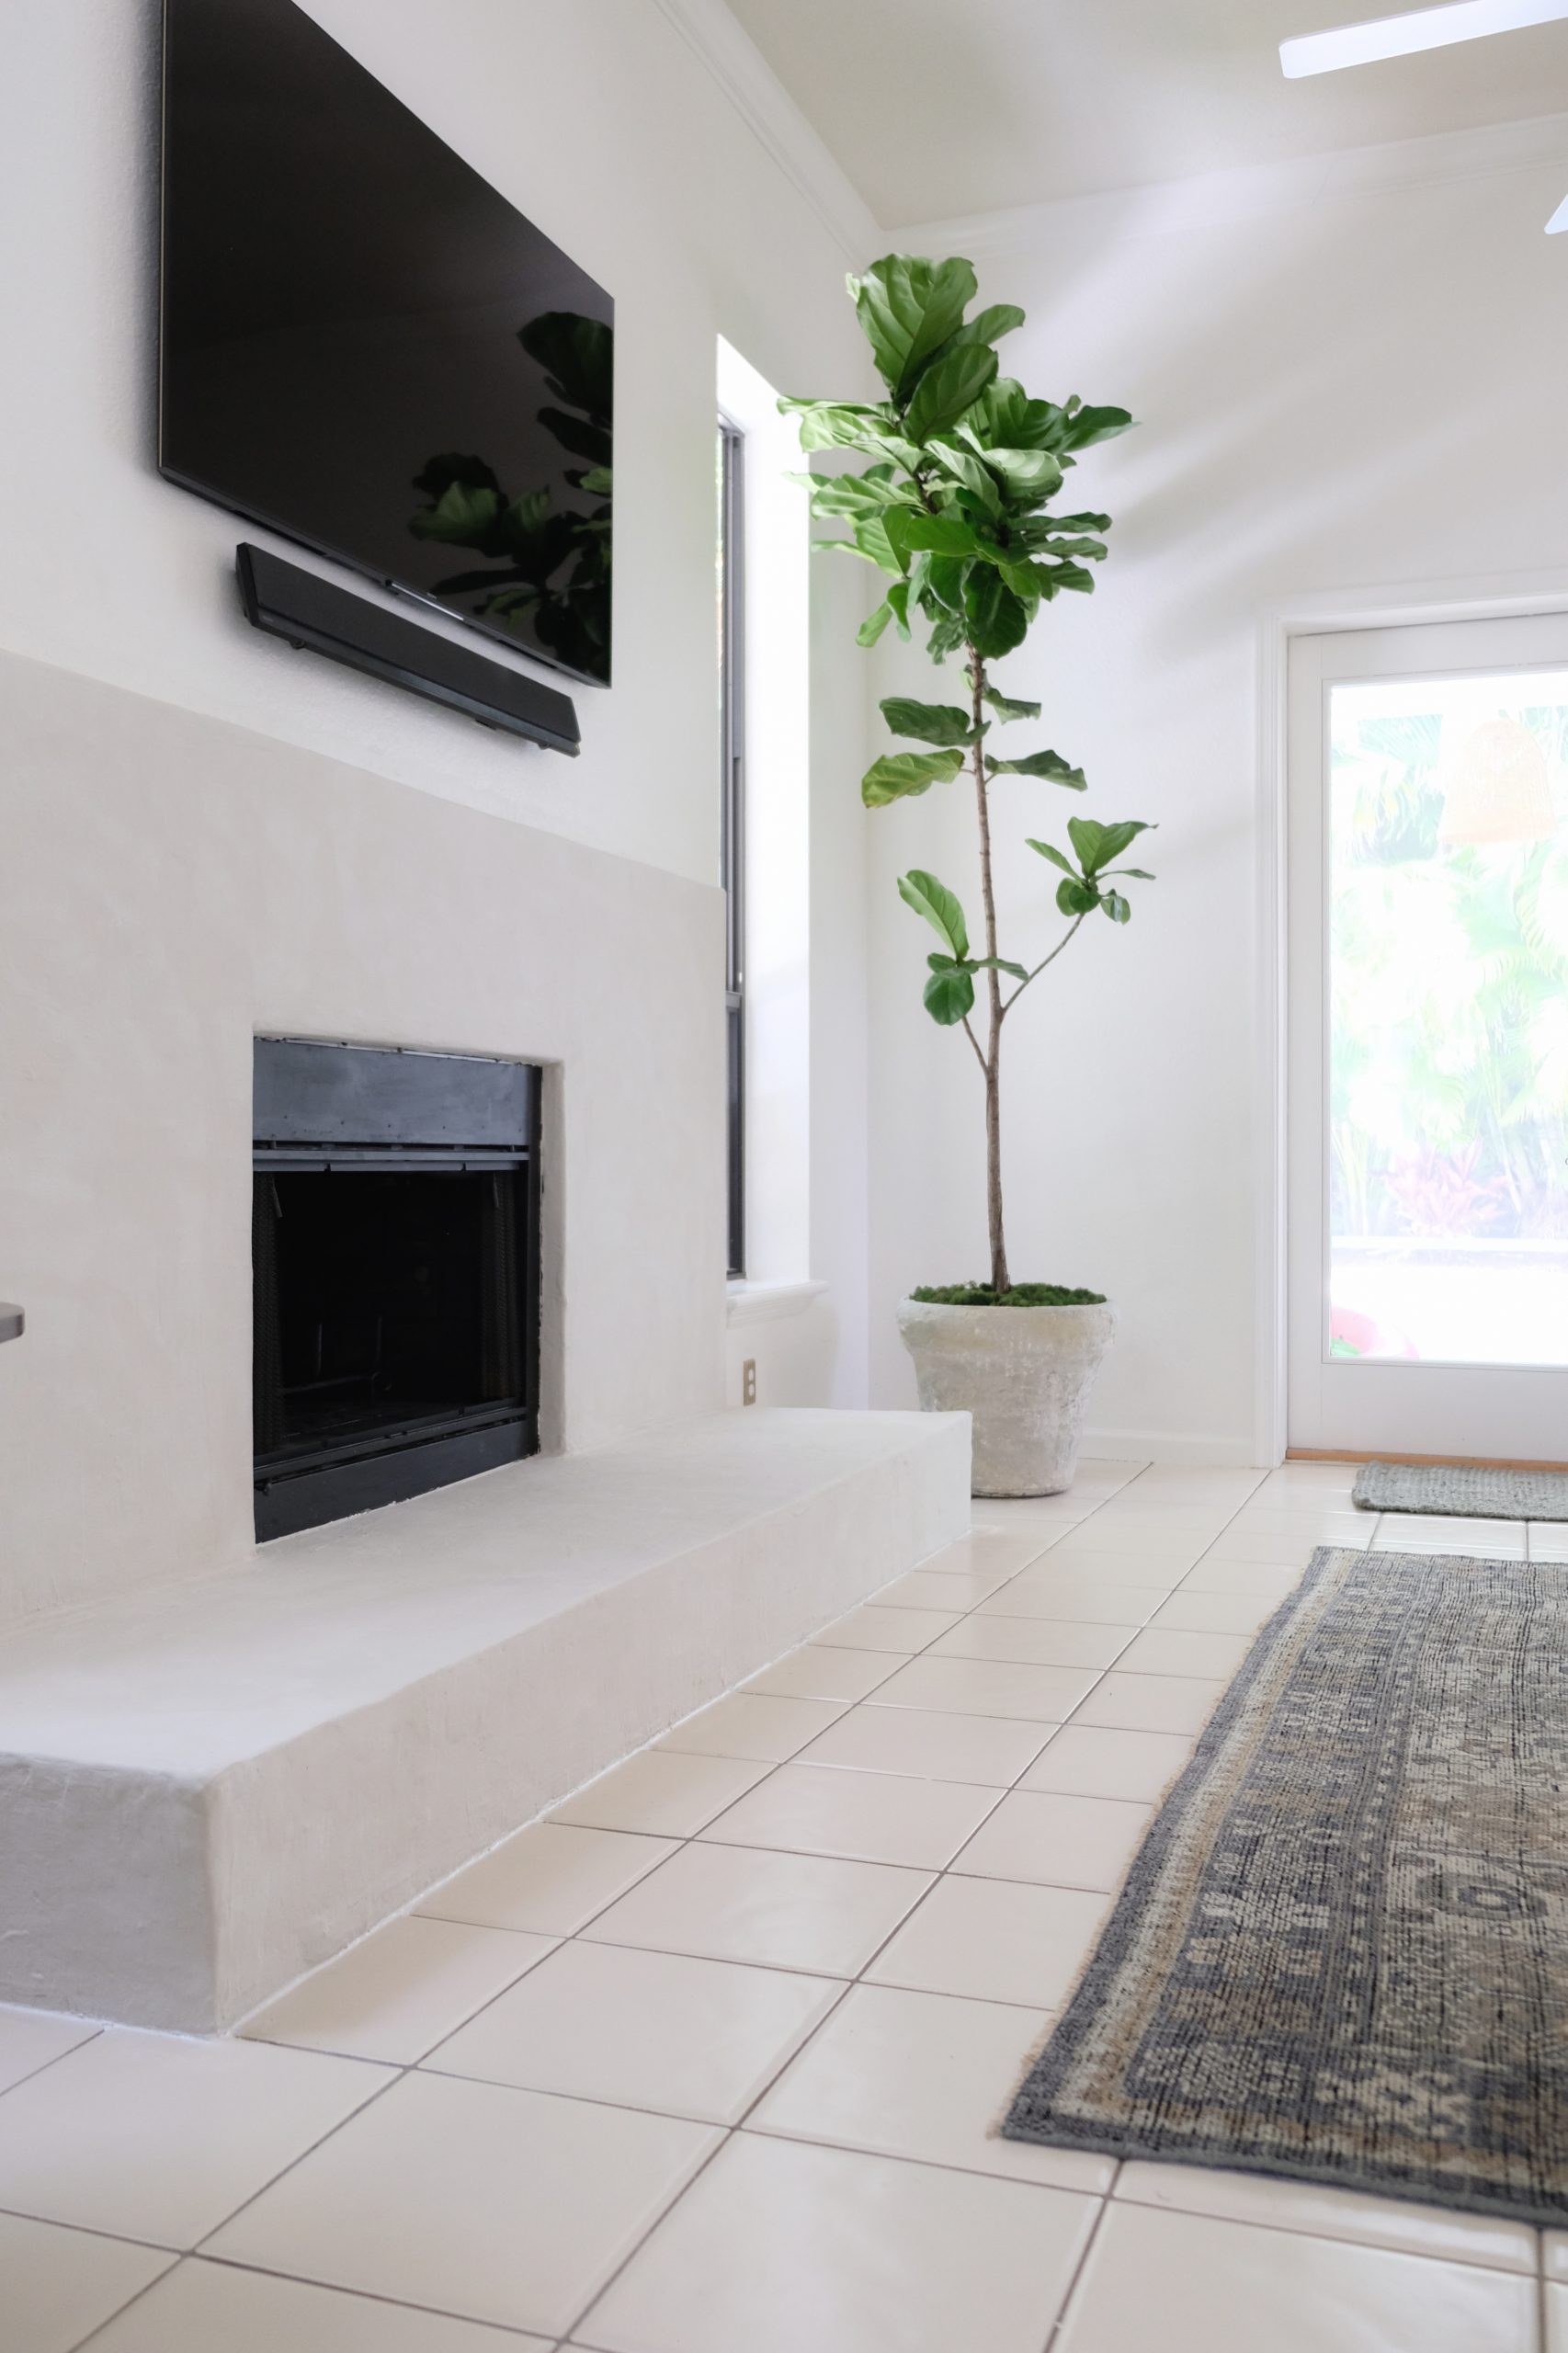
First, I feel I should point out the obvious and ironic. We live five minutes from the beach in an area of the globe that rarely (if ever) gets colder than 60 degrees. The fact that we have a fireplace is already excessive and the idea that we would spend any amount of time or money on it seemed silly to me at first. Side note: Fireplaces are actually very common in this county. Apparently, they are a nostalgic architectural feature brought down by our seasonal residents (aka Snow Birds!) Alas, silly as it may be, our fireplace is just too big of a focal point for my design-heart to ignore.
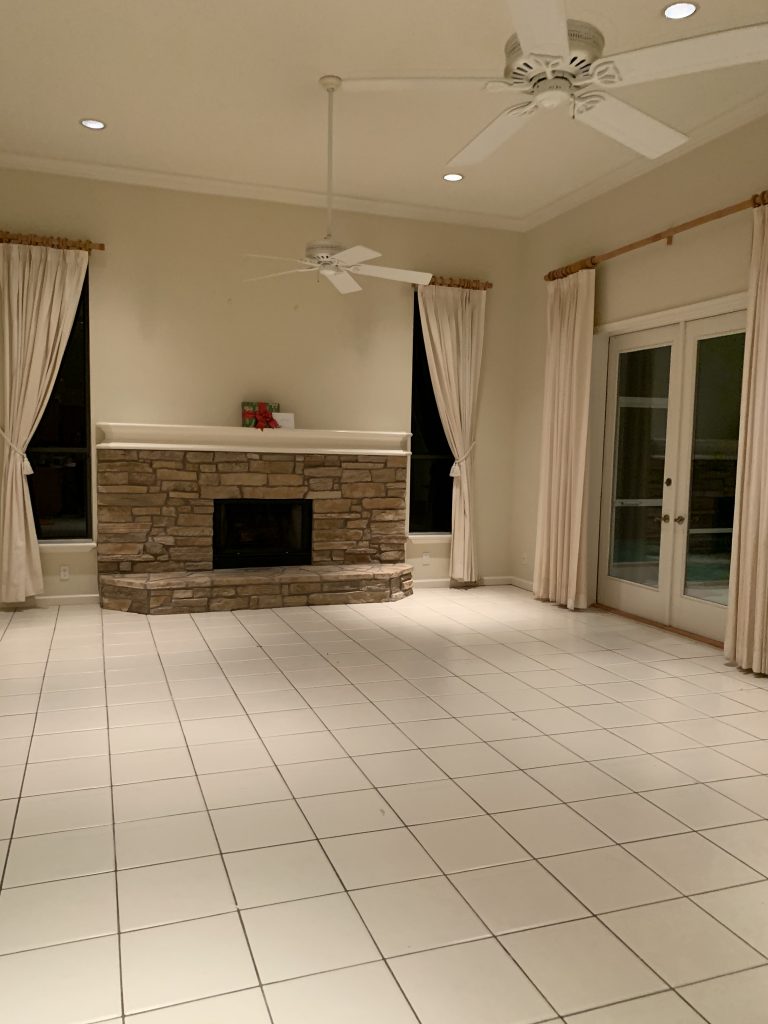
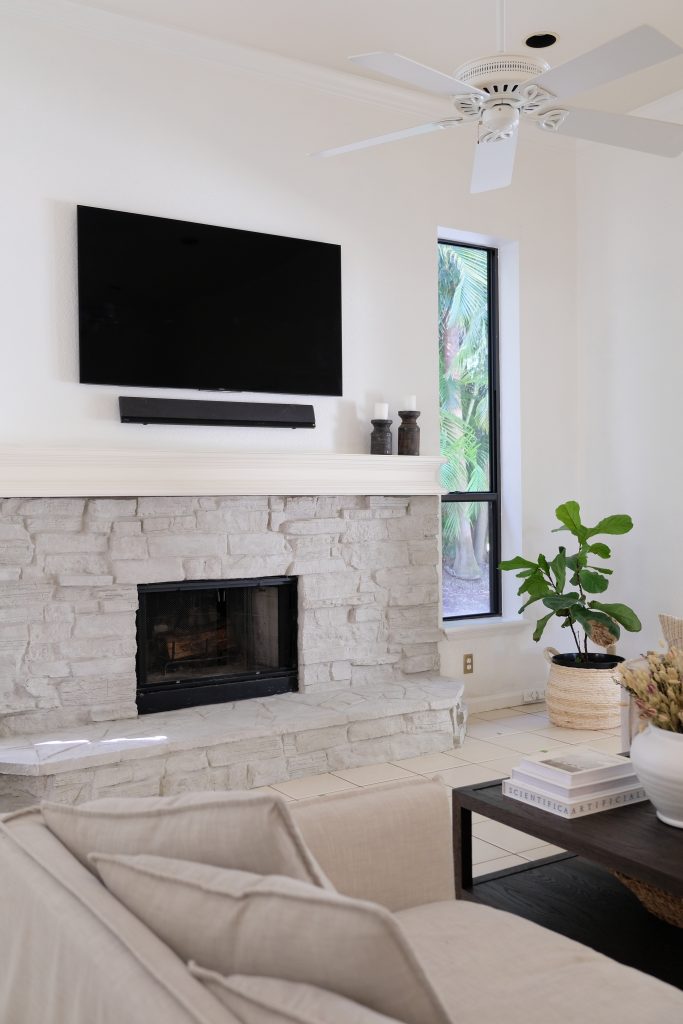
My first attempt at a quick-fix was a coat of lime wash. Then, I started exploring the idea of purchasing a reclaimed driftwood beam to use as a mantel. In fact, I spontaneously demoed the existing mantel one night after work and was thiiiis close to driving to a local lumbar yard to pick out a beam. Suddenly, though, I had a moment of reckoning. It wasn’t really the look I wanted. It still felt too heavy and out of place to me.
Designing The New Fireplace
Finally, we decided it would be worth it to just reface the fireplace and get exactly what we wanted. Not surprisingly, we had a difficult time finding a masonry contractor who could help us with our project. Our fireplace was inspected at move-in, just a few months before this project, so we felt comfortable moving forward on our own.
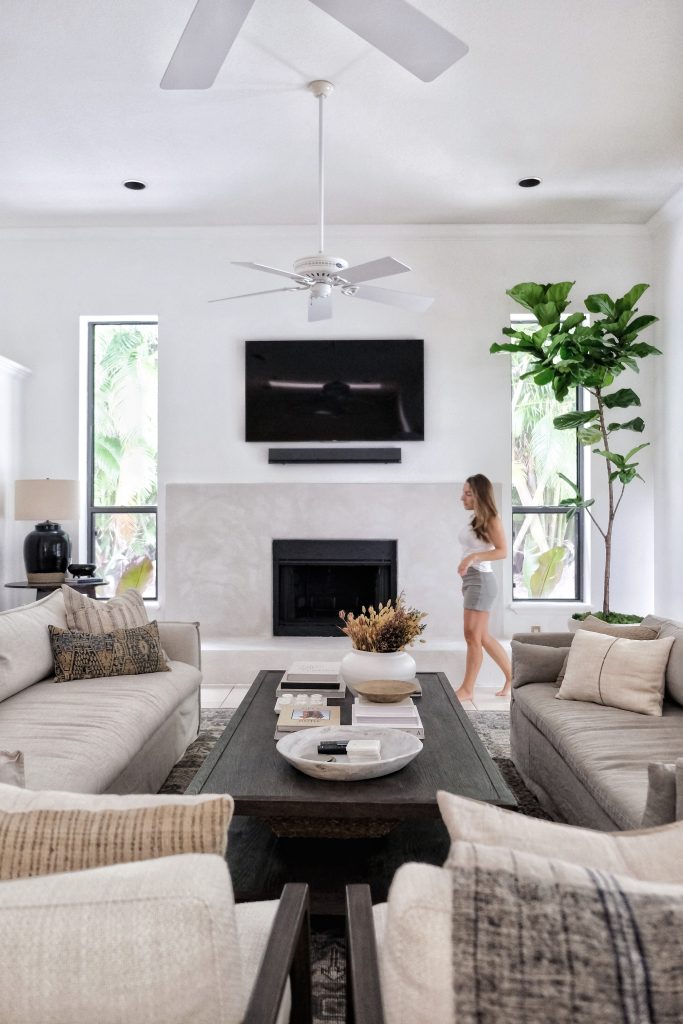
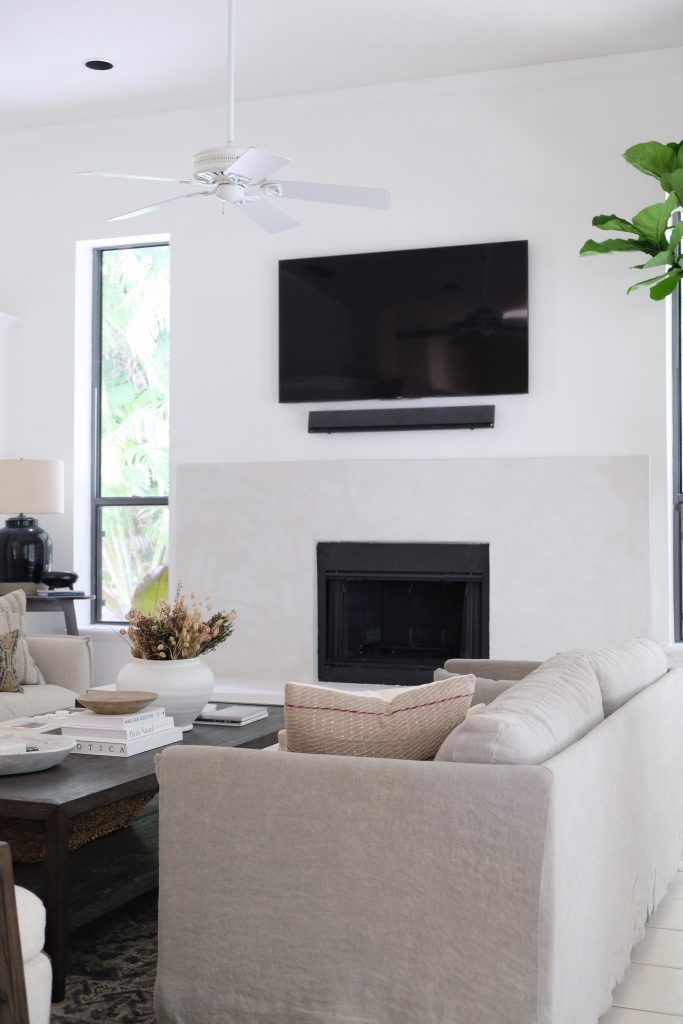
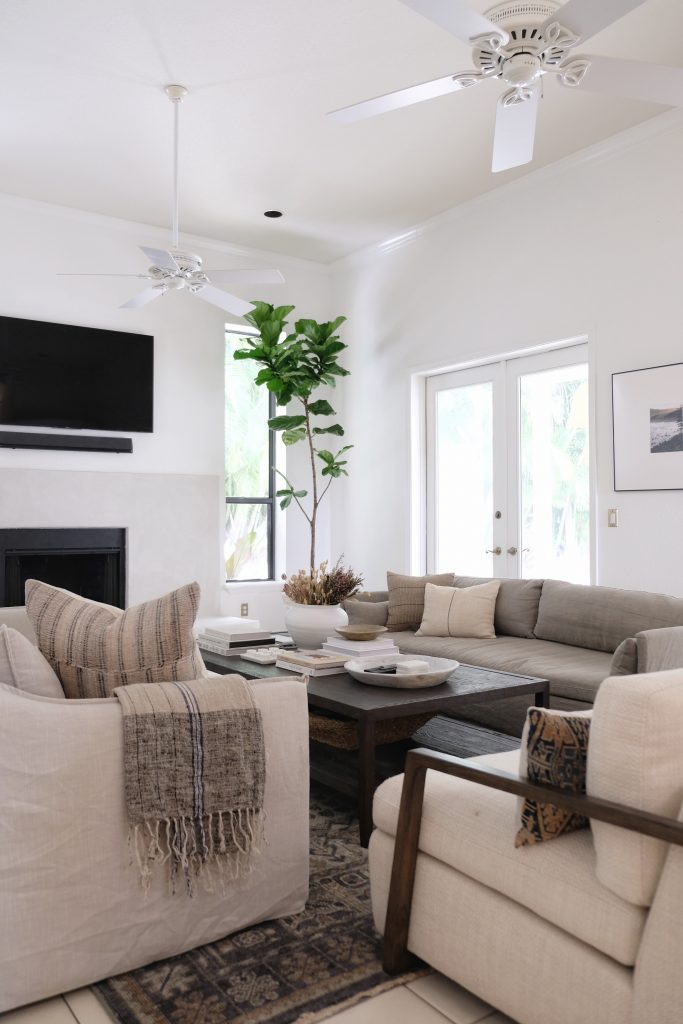
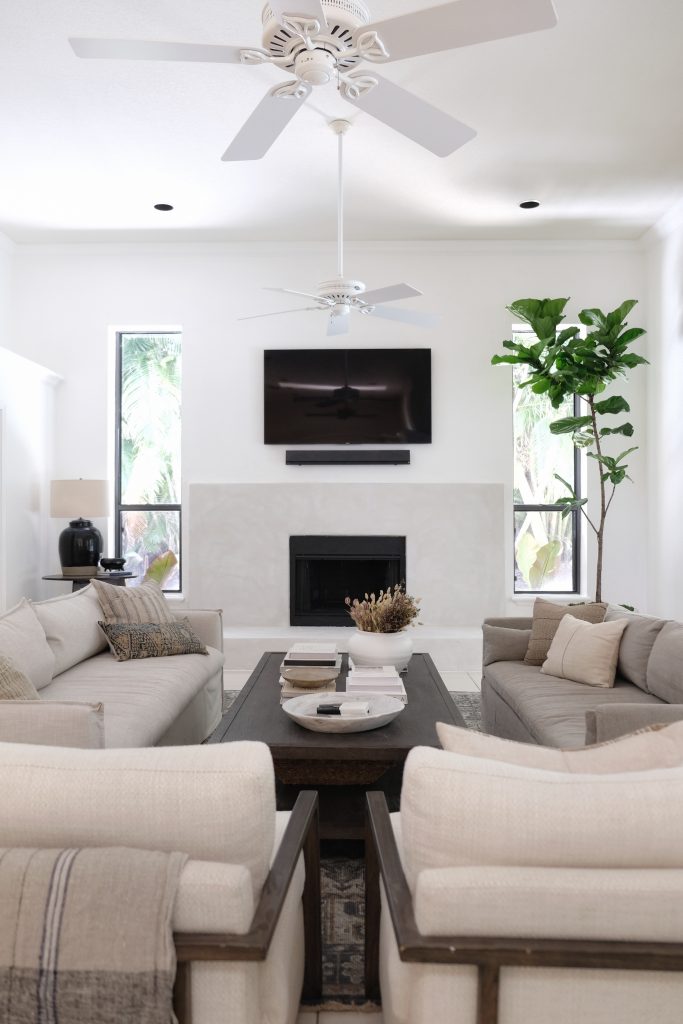
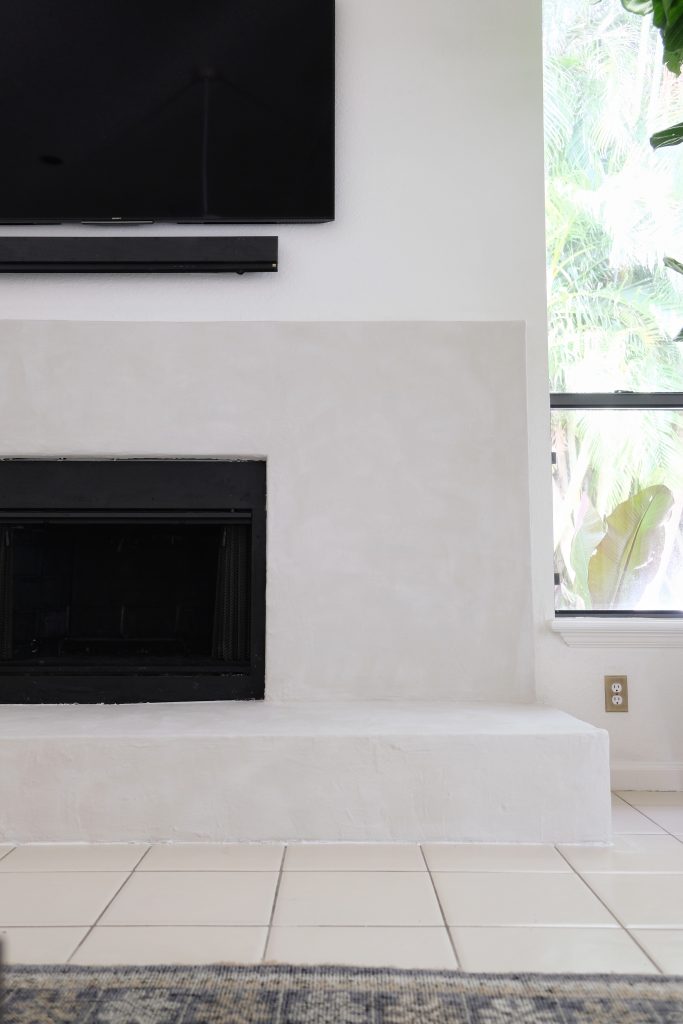
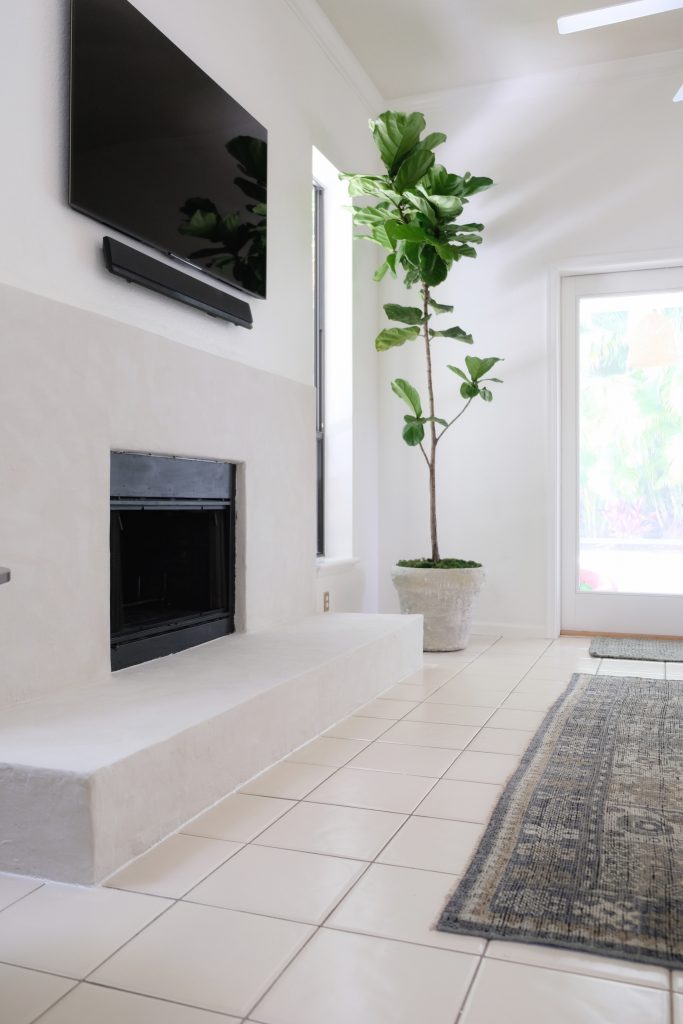
Since the rest of the home is headed in a Spanish Modern direction, I was really in to the idea of a white plaster fireplace with rounded edges. It’s simple, it’s light and a lot less obtrusive than stone. We chose a simple square design that only protruded a few inches from the wall (our chimney is on the exterior of the house.)
I felt that the white mantle was stunting the height of the fireplace and it didn’t feel tall enough for the ceiling height. This made the windows seem awkwardly long and skinny. We opted to skip a mantle all-together and extend the face of the fireplace upwards in its place.
Additionally, the black firebox felt really small compared to the face and hearth extension. A good portion of it had been mortared over with stone, so when we demoed, we decided to keep that portion exposed. This gave the firebox more visual weight. The entire view feels much more balanced and proportional to me now.
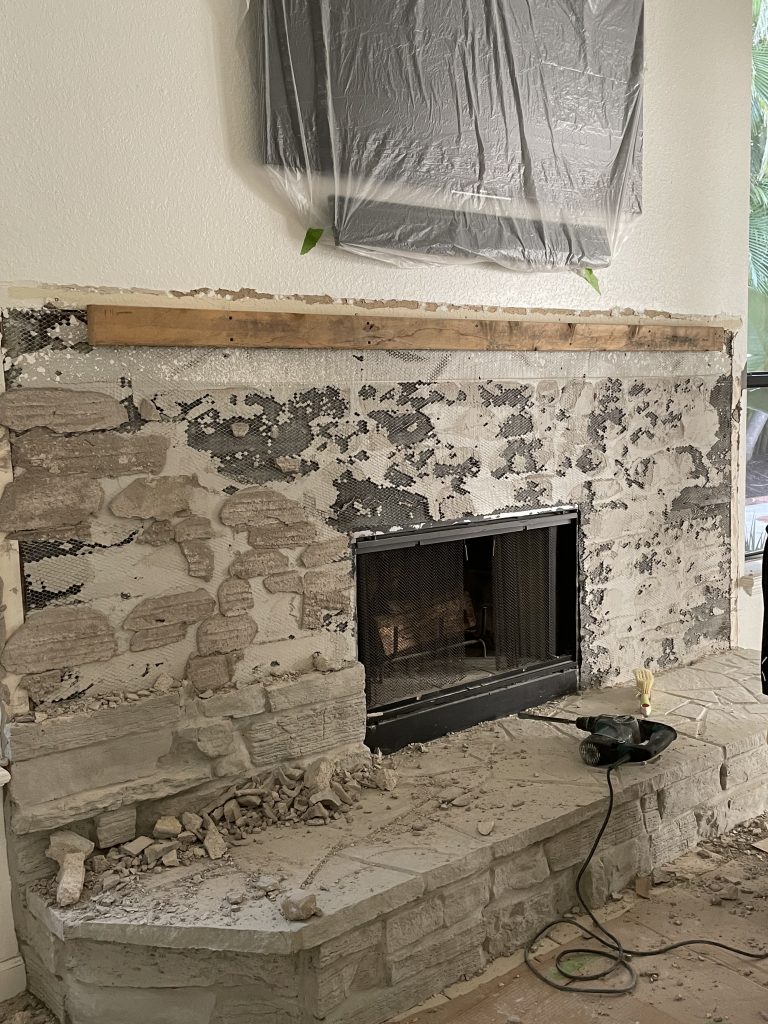
Demo The Existing Stone Veneer Fireplace
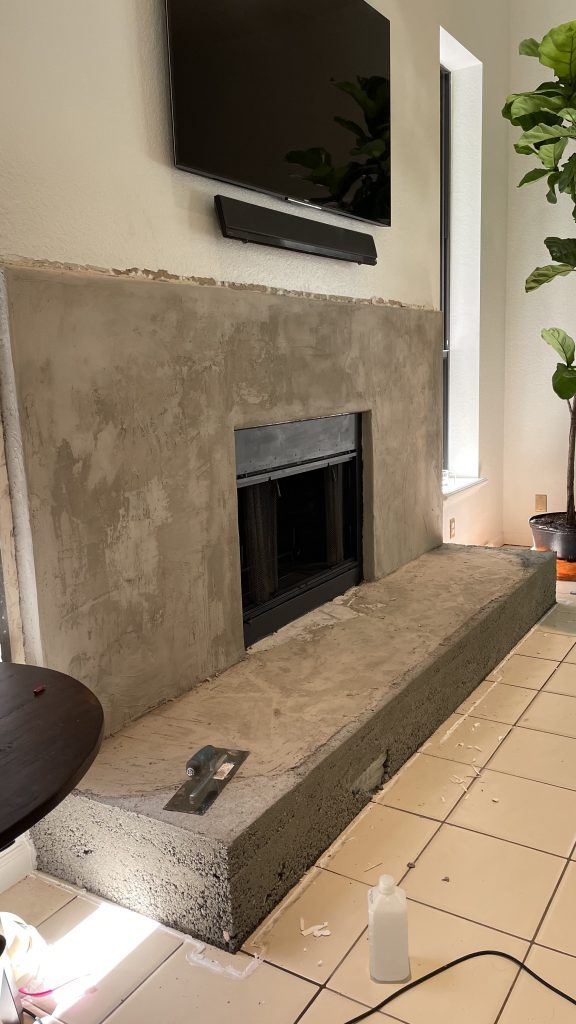
Since the existing stone veneer was so varied in depth and since it butted right up to our windowsills, simply covering it or framing it out would have been difficult. We decided it would be best to remove it all-together. The stone came off fairly easily with a demolition hammer that we rented from Home Depot. We opted not to demo the hearth since it was more uniform and easier to frame out. Using the existing structure saved us a lot of time and money. We built a temporary frame around it to square off the shape and filled it with concrete.
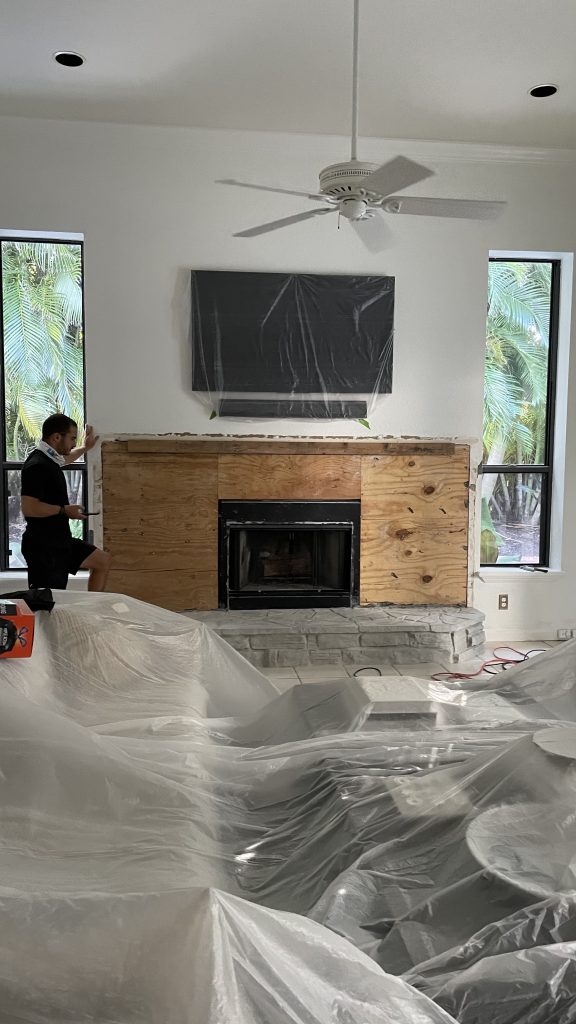
Frame it Out
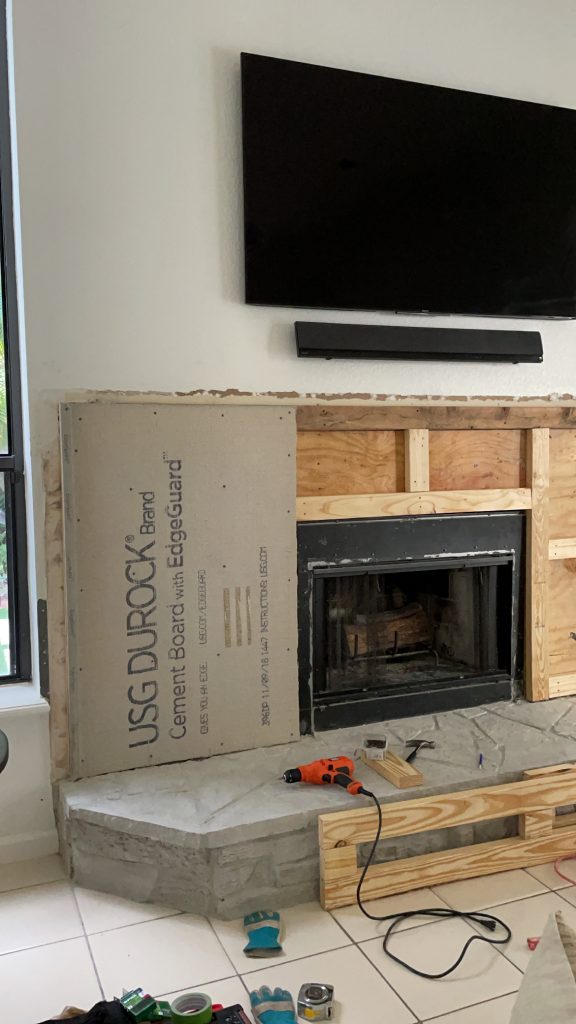
The next step was to frame out our new facing with 2 x 4’s. The existing plywood backing stayed intact so that made it easy to attach them. Be sure to check your local code for safety requirements when using combustible materials as part of your build. Our code requires that internal beams be at least 2″ from the opening of the fireplace so we were in the clear. If you’re not sure where to start, we found UpCodes to be a great resource.
Cover it with Cement Board
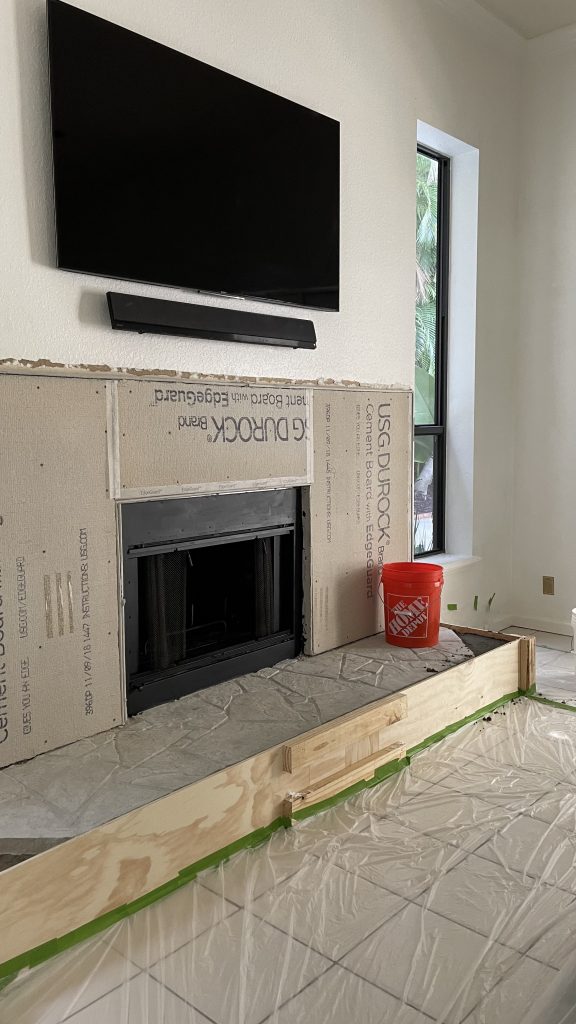
Next, we attached Durock cement board sheets over the frame. It’s a strong, non-combustible alternative to drywall. It’s very easy to cut down to size. You can score it with a utility knife and simply snap it apart! We used these special screws [here] to attach it to the frame.
Layer it with Feather Finish Skim Coat
The next step is to tape up all of the cement board seams in preparation for your skim coat. (We used this here.) Similar to drywall mudding, this step covers your seams and gives the fireplace a uniform, smooth surface. If you’re going for the concrete look, you can actually leave it like this! I was generous with the skim coat around the corners and hand-shaped them so that I ended up with a rounded edge. This created a softer, slightly more “aged” aesthetic instead of a sharp and modern look.
Lime Wash Finish
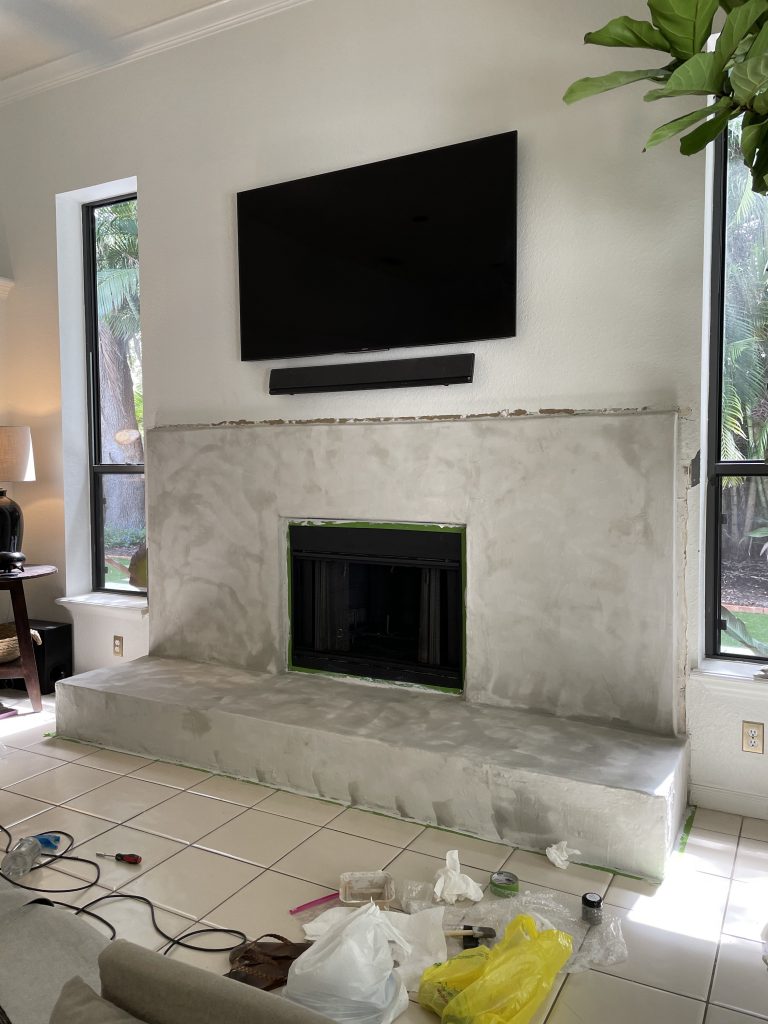
Finally, I hand-sanded the fireplace for a super smooth finish that was comfortable enough to sit on. I used a course grit block first and then finished with a higher grit block. The feather finish is fairly soft and doesn’t require much muscle to get it smooth. You could certainly use a rotary sander but it’s really not necessary and I felt I would risk ruining my curved edges.
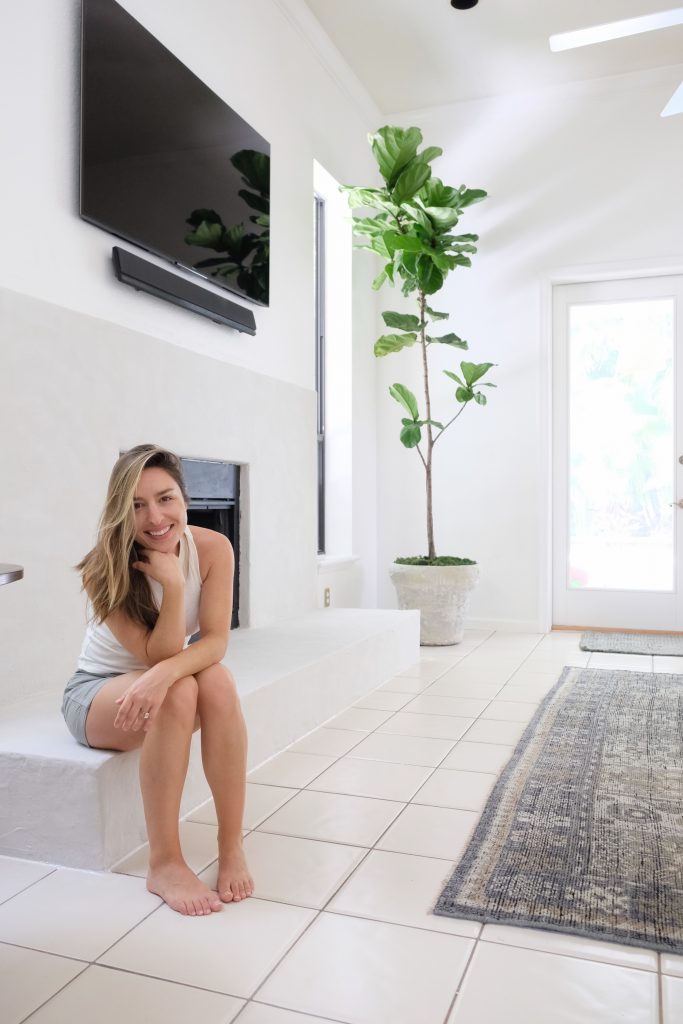
Once I got it smooth, I painted the fireplace with a special lime wash primer and then lime washed it. Lime Wash is actually made of powdered limestone so it dries hard with a stone-like texture. I like to use a 5″ block brush [here] to apply it in alternating over and under “swoops” for some subtle movement. The finished product is not too dissimilar from the look you achieve with plaster but it has some added variation to it. I ended up mixing a few colors to get the perfect warm hue that was just slightly darker than the walls. (I purchased a gallon of Feather and poured in a sample jar each of Bistrot, Runaway and Half Moon Bay.) This helps further establish the fireplace as it’s own piece and offers a bit of dimension in the space without being too loud.
Firebox Repainting
The firebox itself needed a little facelift as well. I vacuumed and scrubbed the interior brick and repainted the entire box – inside and out – with an ultra matte black paint formulated specifically for high heat applications [here]. Read the instructions carefully when using this type of paint! You’ll want to open your doors and windows and wear a mask. Once it dries, however, it’s non-toxic.
Miscellaneous Detailing
The final stretch of the fireplace renovation required lots of little detailed fixes. I had to patch the drywall surround and recreate the splatter knockdown texture (which is not easy and I’m not totally happy with the results yet so I’ll spare you the tutorial.) For a finished look, we caulked all of the fireplace seams standard silicon caulk and will caulk the fireplace box with a high-heat sealant.
How much did it cost?
Assuming you have some basic tools on hand (or the ability to rent them) this is a relatively inexpensive project to tackle. The only power tools we used were a drill and a demolition hammer. Our fireplace is fairly large – 9 feet by 5 feet plus the hearth extension – so a smaller fireplace could easily cost less.
Tools:
Demolition Hammer (rental) – $50 [here]
5 gallon bucket – $3
Materials:
2 x 4 Lumbar, 3 x 5 Cement Board, Nails & Screws [here], Seam Tape [here] – $130
6 Bags Feather Finish – $108 [here]
2 80lb bags high-strength Concrete – $10
Lime Wash Primer & Paint and Block Brush [here]- $130
Misc (trowel and knife for feather finish, foam paint brushes, etc.) – $25
Protective Goggles, Gloves and N-95 Masks* – $10
Sanding Blocks – $10
Firebox Paint – $27 [here]
Total Project Cost | $500
*Demolition of stone, mixing concrete or cement and using high-heat paint all pose eye, skin and respiratory health hazards. Please gear up!
What’s next for this space?
With the exception of some small remaining details, the fireplace refacing marks the completion of Phase One! In the next year, we plan to install medium toned engineered hardwood flooring throughout. I think that will warm the space up nicely. We also plan to remove the decorative wall ledges and replace the french doors with impact doors suitable for hurricane season. You can catch all of the updates over on Instagram!

Looking for more? Subscribe below for my FREE Guide to Decorating
Related Posts
Vintage Frames for Every Budget
Vintage frames instantly add character to your walls. Here is a round-up of some…
March 24, 2021Bedroom Refresh Plans
Our bedroom wasn’t part of our five-year renovation plans but it’s got…
February 17, 20212 COMMENTS
Leave A Comment
This site uses Akismet to reduce spam. Learn how your comment data is processed.
© 2020 gold coast canvas. all rights reserved.



Sharon Cook | 7th Jun 22
Is this a gas or wood fire place?
We ar finishing ours in the next few weeks and love yours
admin | 6th Jul 22
Hi Sharon,
Thank you! This is a wood burning fireplace.
Best,
D